
Print makes a PDF of your design. At full size one inch on the paper is one inch on your panel, so you can lay the print on the panel blank and see how everything sits. It reads your design and changes nothing.
Make the PDF
- Open your design. It needs at least one instrument.
- Click Print in the tool row (the printer).
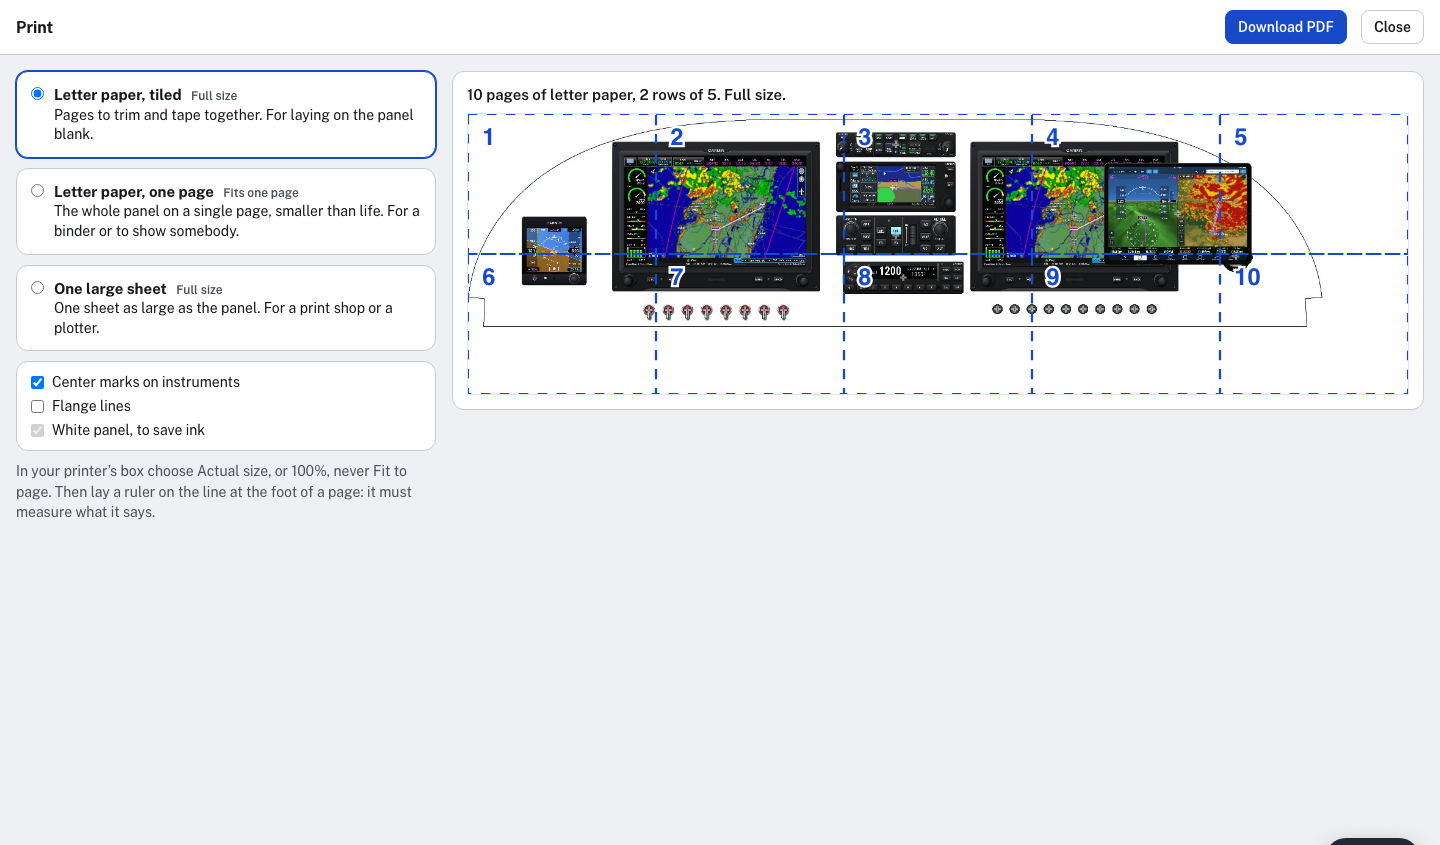
- Choose how you want it:
- Letter paper, tiled is full size on ordinary letter pages. The picture on the right shows how many pages and where each one falls.
- Letter paper, one page is the whole panel on a single page, smaller than life. It is for a binder or to show somebody, and the page says what share of actual size it is.
- One large sheet is full size on one sheet as large as the panel, for a print shop or a plotter. The page says the sheet's size in inches, which is what the shop will ask.
- Click Download PDF. The file is saved to your computer.
The three checkboxes
- Center marks on instruments puts a small cross on the middle of every instrument, switch and circuit breaker. They are on the two full-size prints only.
- Flange lines adds the template's flange lines, where it has them. They are left off unless you check this.
- White panel, to save ink prints a panel that has a color as a white one: its outline, its cutouts and the instruments, with no color filled in. Your design keeps its color. On a panel that is already white the box is checked and cannot be changed.
Print it at full size
In your printer's box, choose Actual size or 100%. Never choose Fit to page, Shrink to fit or Scale to fit: any of them makes the print smaller than your panel.
Check it before you trust it. Every full-size page has a line at its foot that says "This line is 4 inches". Lay a ruler on it. If it does not measure 4 inches, the printer changed the size: print again at Actual size.
Join tiled pages
Each tiled page has a gray line round the part of the panel it holds, a mark at each corner, and its place at the top: "Page 3 of 10 (row 1, column 3)".
- Trim each page on its gray line along the right and bottom edges.
- Lay it over the next page so its trimmed edge meets that page's gray line and the corner marks meet.
- Tape the row, then join the rows the same way.
Good to know
- The print shows the design as it is on your screen now, saved or not, with its placards, add-on panels and panel color. Construction lines and Measure's lines are not in it.
- The one-page print is not for measuring. Its ruler is marked in inches of the panel only to show its scale.
- A print is a guide for layout. Check every cutout against the manufacturer's installation drawing before cutting metal.
After an account's 14 days, this needs a membership. See Every tool for 14 days, then membership.